Maintaining a pristine cleanroom isn't just about disinfection—it's also about removing the residues that disinfectants can leave behind. This often-overlooked step is critical in preserving visibility through cleanroom windows and maintaining GMP-compliant standards, especially in light of Annex 1's updated guidance on residue removal. Let’s dive into where residue accumulates, why it matters, and how to eliminate it with the right tools and technique.
Where Residue Accumulates—and Why It’s a Problem
When using cleanroom disinfectants across all surfaces—ceilings, walls, floors, and workstations—it’s natural for some residue to be left behind. Over time, this residue can build up. While accumulation may occur anywhere, it becomes most visible and problematic on:
-
- View windows
- Glazing panels
- Reflective stainless steel
- Glossy surfaces
In these areas, residue creates a cloudy, hazy film that obstructs visibility, and also signals a gap in the cleanroom cleaning procedure.
The Root of the Issue: Not Just the Product—It’s the Process
When customers ask, “We’ve tried everything—how do we remove this residue?”—the answer starts with a deeper look at their residue removal process.
Too often, facilities assume that applying IPA (isopropyl alcohol) or water in the same way they apply disinfectants will suffice. But this approach misses a critical step: mechanical removal of the solubilized residue. Applying a rinse agent without following up with a removal tool simply rehydrates the residue—then allows it to dry again, leaving the surface just as cloudy.
Effective Residue Removal Requires
Intentional Action
Here’s the three-step approach that ensures effective residue removal:
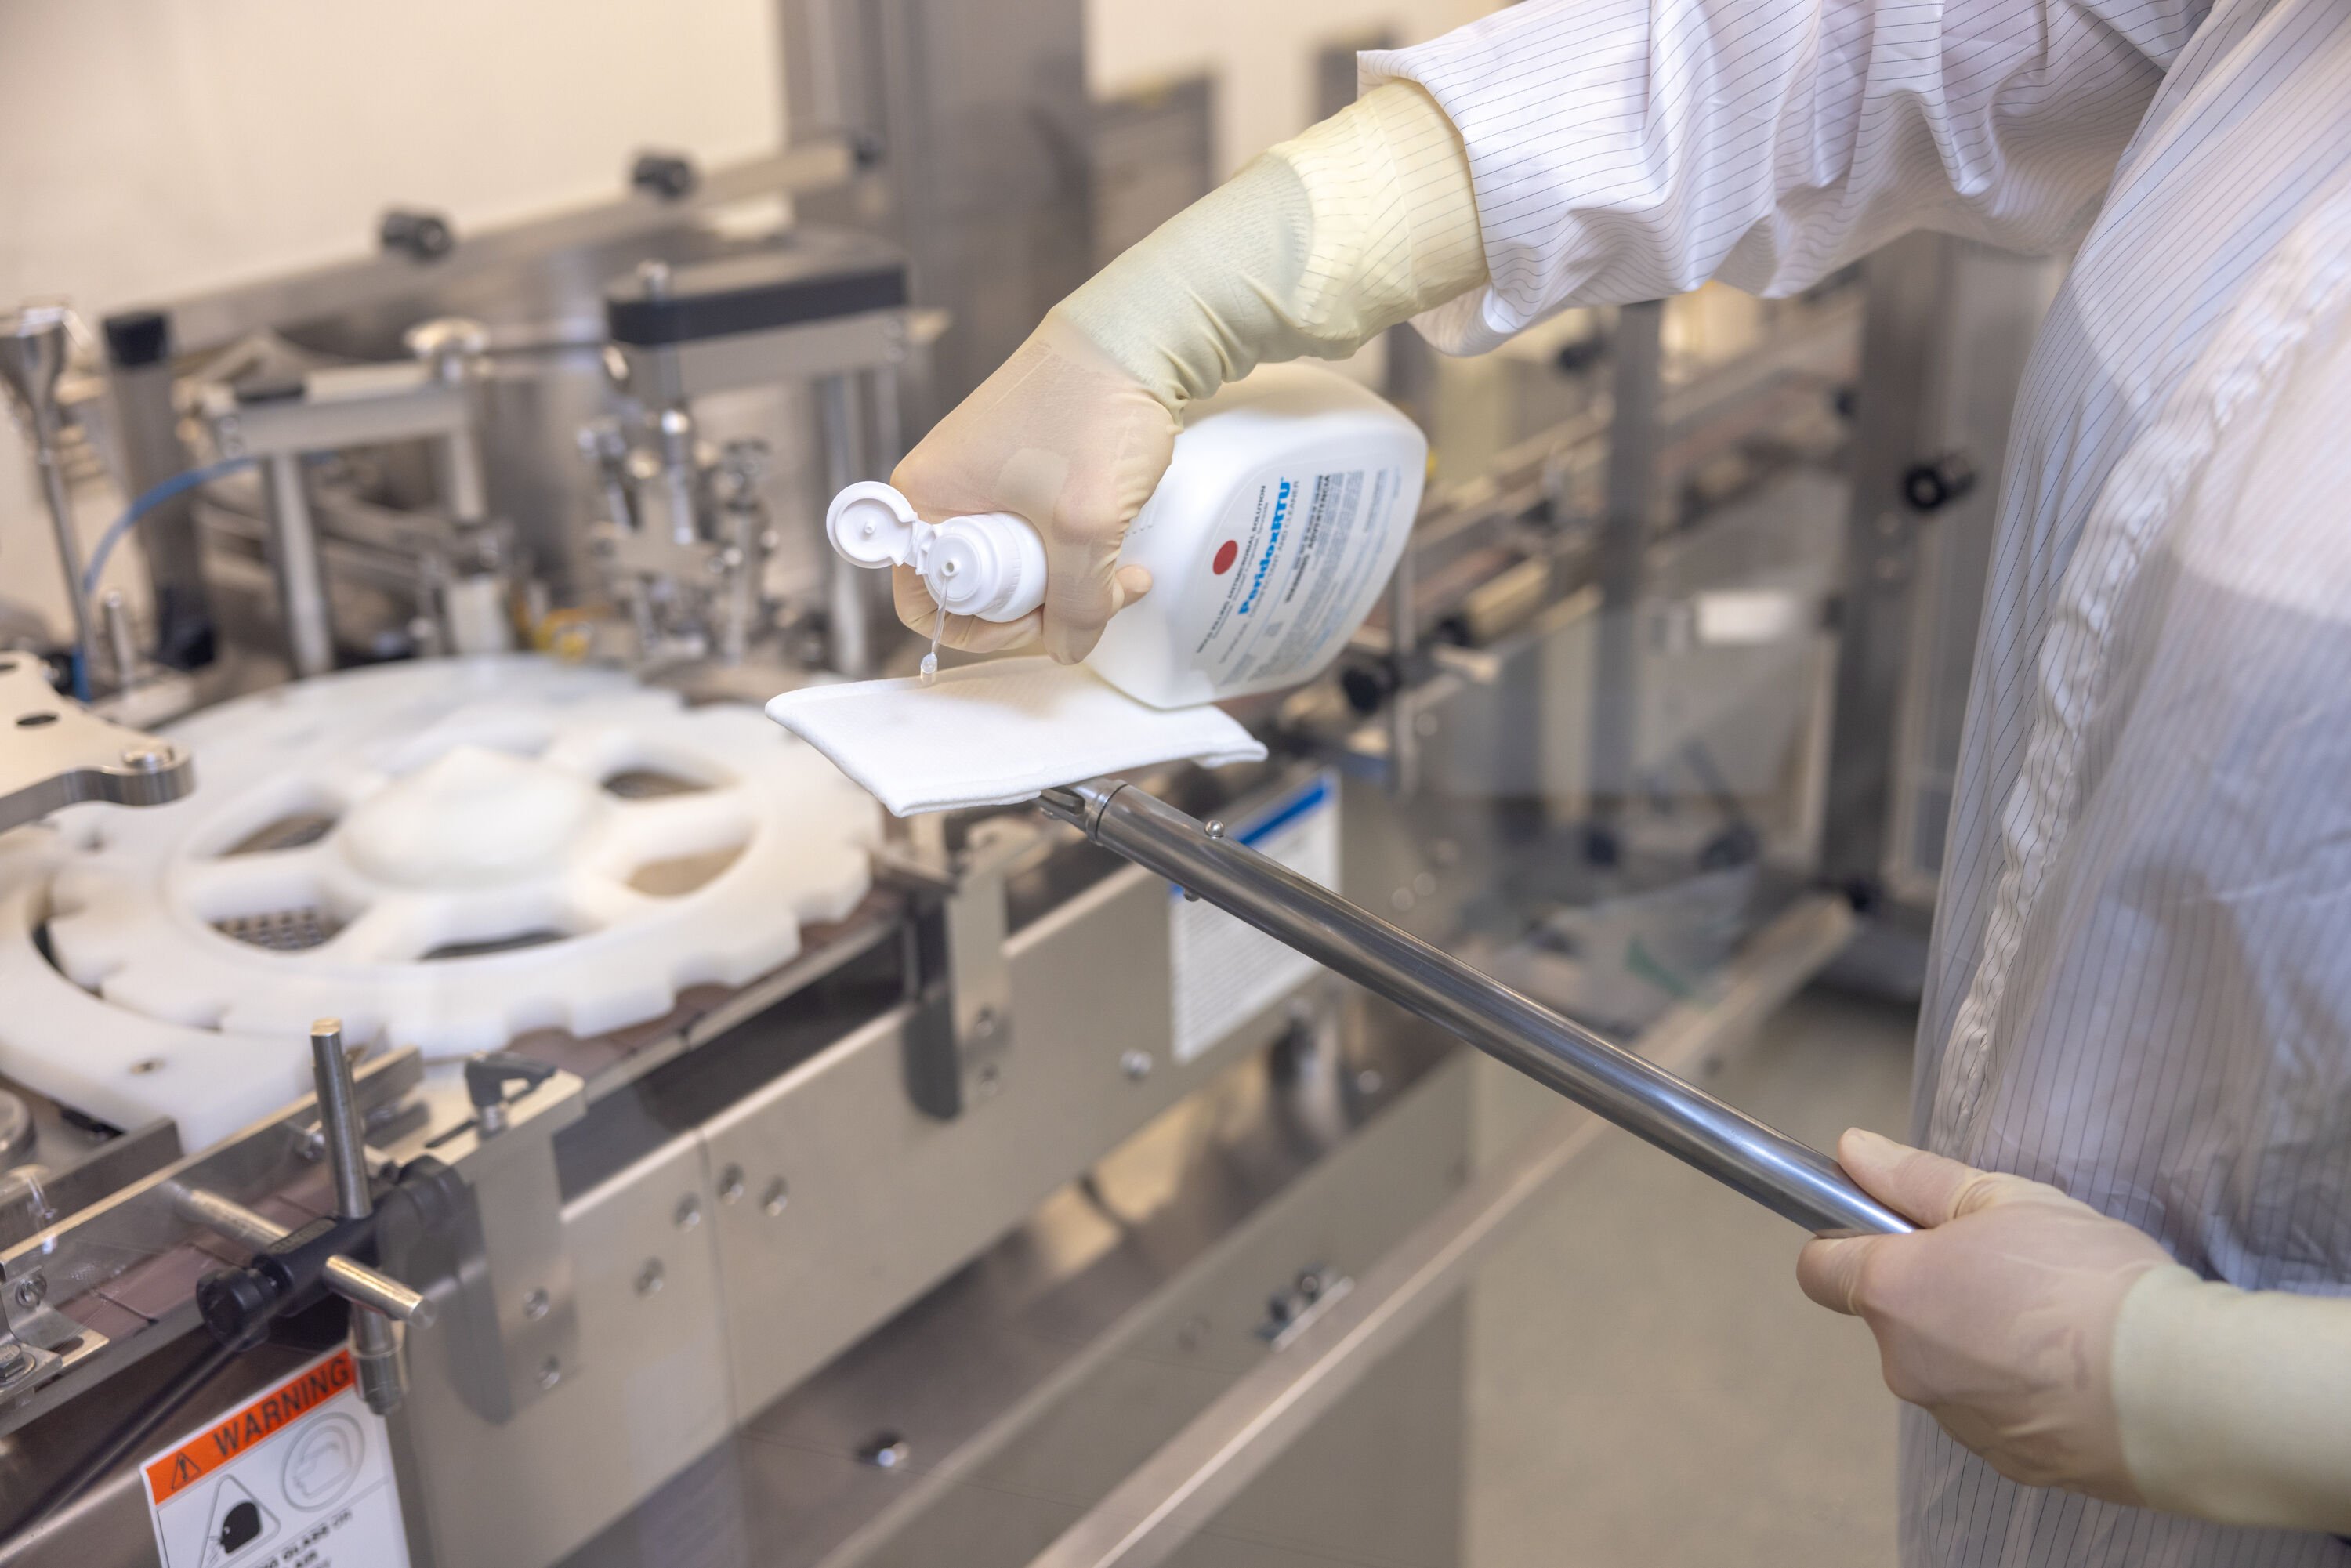
1. Apply residue removal solution
Apply an appropriate solution—commonly sterile water, sterile IPA, or another rinse agent—that can rehydrate and loosen the dried residue.
2. Allow residue to solubilize
It’s important to wait the appropriate amount of time for the residue to solubilize prior to removal. If you’re unsure about the time, test one area before applying to the entire surface.
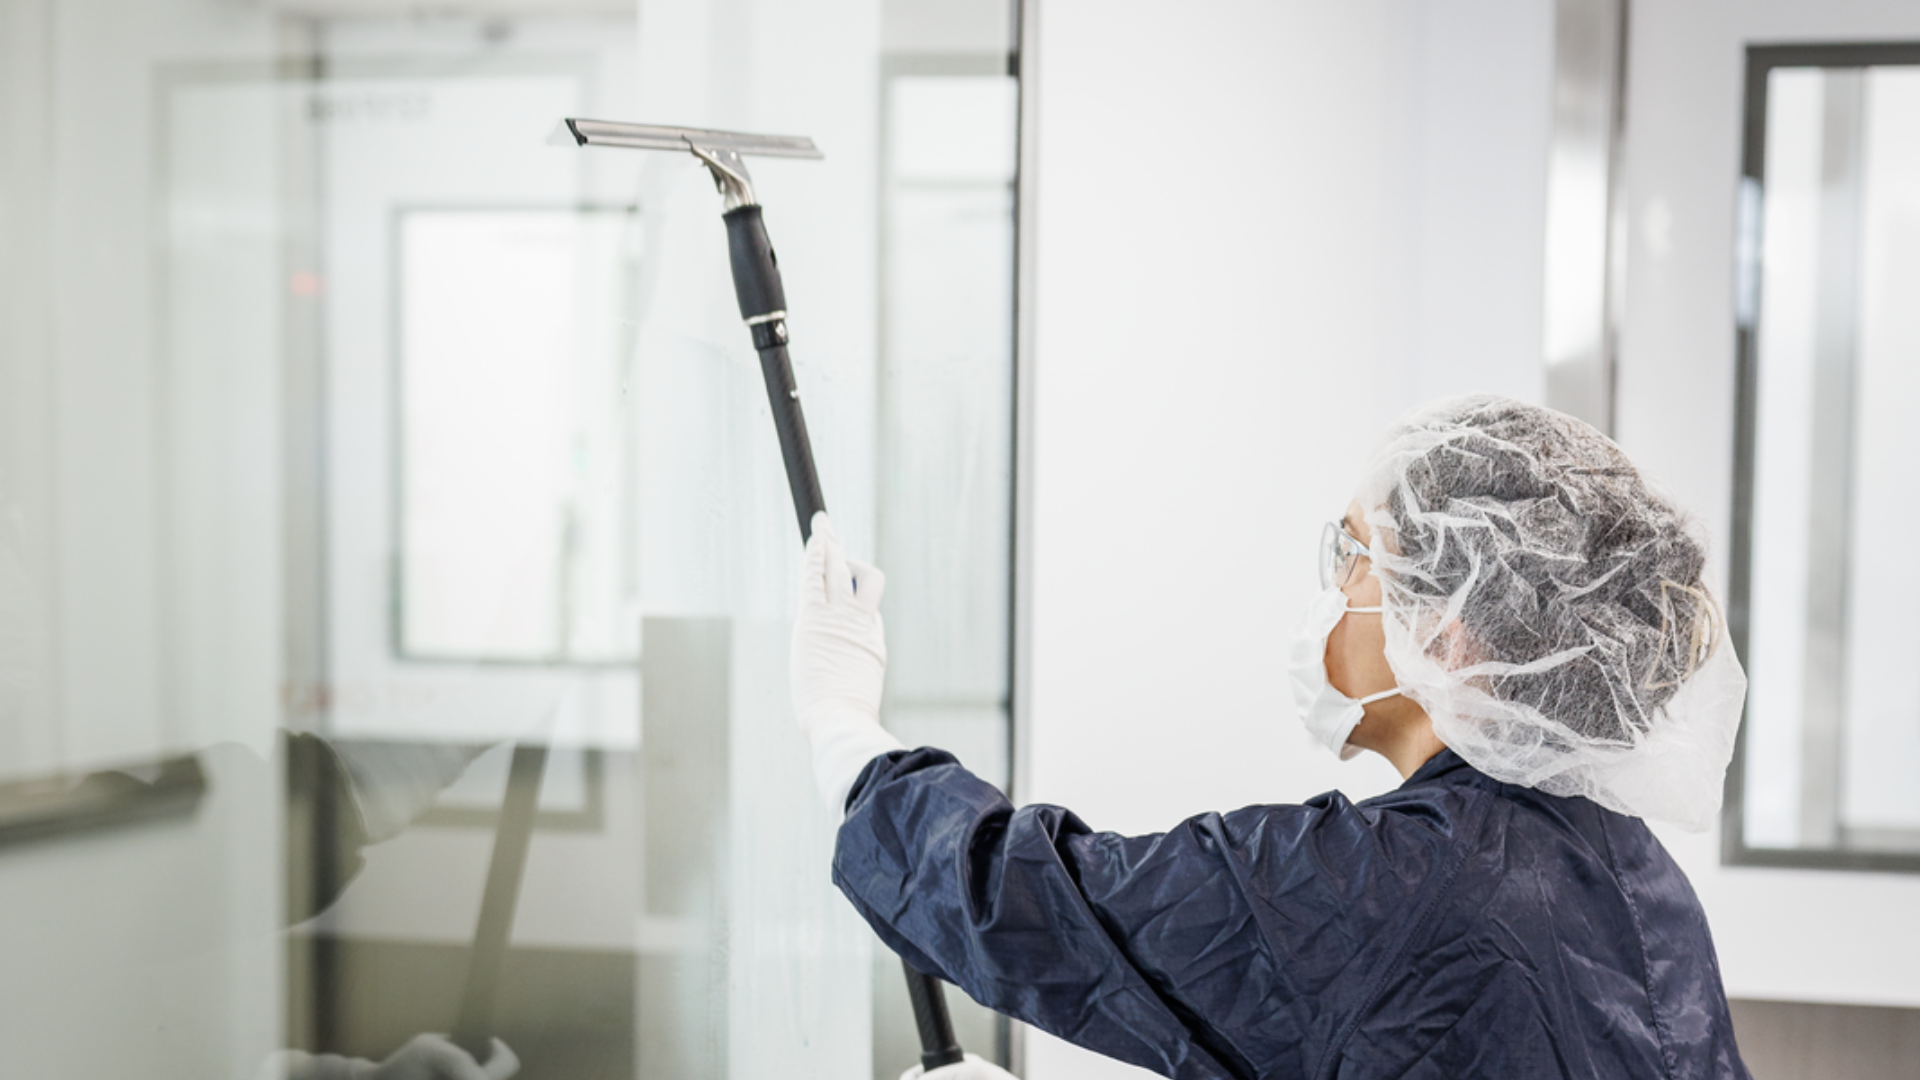
3. Mechanical Removal
After solubilizing, it’s crucial to follow up with a dry cleanroom wiper, mop or squeegee to physically remove the residue from the surface. For windows or reflective surfaces, consider specialized tools like cleanroom squeegees. These offer superior mechanical action, reducing streaking and ensuring thorough removal. Without this step, residues can re-deposit and compromise your cleanroom’s integrity.
Key Takeaways for Clear Windows include:
-
- Using the right residue removal solution
-
- Incorporating intentional mechanical action
-
- Employing a purpose-built cleanroom squeegee
Don't Let Residue Undermine Your Cleanroom Standards
Residue is a natural byproduct of using cleanroom disinfectants—but leaving it unaddressed can undermine compliance and cleanliness. By using the correct cleanroom cleaning products and intentional methodology, facilities can effectively remove buildup, restore visibility, and meet the expectations of Annex 1 and other regulatory frameworks.
Do you have a contamination control issue in your facility? Contact your Sales Representative to learn more about our contamination control assessments.
.png)